
Overview
The Research Cloud Query Tool provides quick access to custom data files through a user-friendly, drag-and-drop interface. This tool is designed to help you efficiently work with research data in a flexible format.
Best for:
- Creating custom data files on-the-fly
- Exporting data for analysis
- Creating a sharable verbatim file
Highlights:
- Combine datasets from multiple sources
- Choose only the fields you want
- Add custom filters
- Customize column appearance and order
- Share with others via the Research Cloud
- Export to an editable CSV file
Accessing the Query Tool
The Query Tool can be accessed through the Research Cloud interface. Once you’ve logged into the platform, you can locate the Query Tool through the navigation menus or within a specific research project.
Basic Query Functions
Creating a New Query
- Navigate to your survey or dataset
- Click “+ Add” and select “Query” to create a new query
- This will automatically open the Design Mode interface
Opening an Existing Query
- Navigate to your survey or dataset
- Select the previously created query from the available options
- Upon opening a preexisting query, you’ll need to select “Enter Design Mode” to begin editing
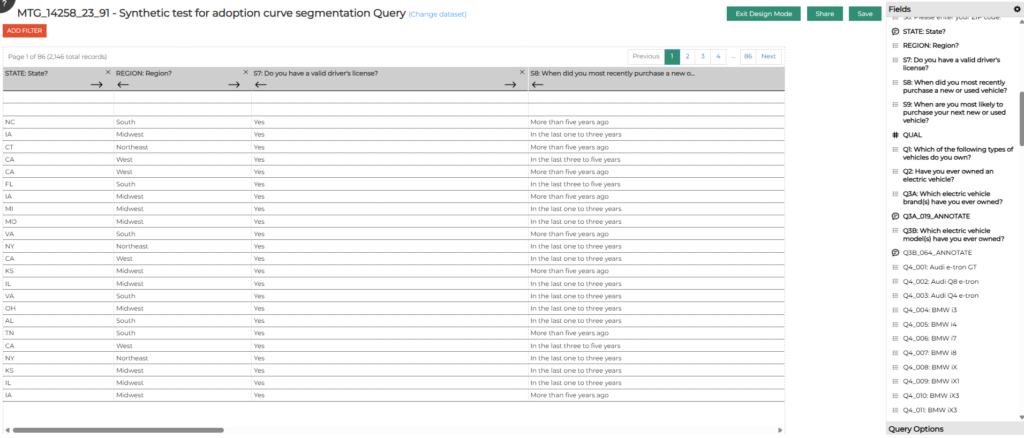
Design Mode Interface
When you add a new query or enter Design Mode for an existing query, you’ll see the following elements:
- Query caption: The name of your dataset (displayed at the top)
- Fields list: Available fields from your dataset (displayed on the right)
- Design area: The main workspace where you’ll arrange your fields
- Filter button: Allows you to apply filters to your data
- Design Mode, Share, Save buttons: Located at the top of the interface
- Query options: Additional settings for your query
- Export button: Located at the bottom right
Adding Fields
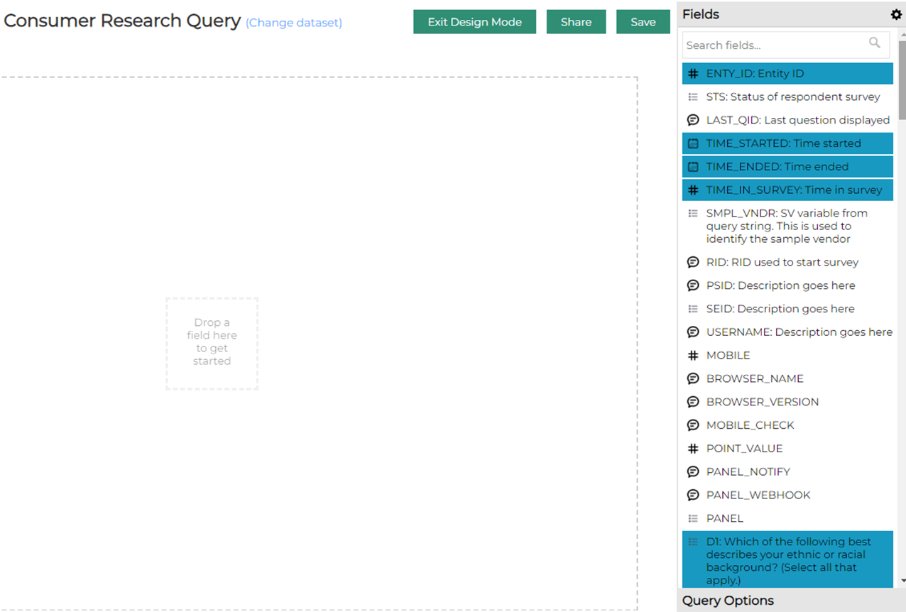
Basic Field Selection
- Select fields one at a time by dragging and dropping to the open space on the left
- Alternatively, select multiple fields at once by:
- Pressing the Control Key while selecting fields, or
- Pressing the Shift Key and dragging to select consecutive fields
Adding Fields to a Specific Location
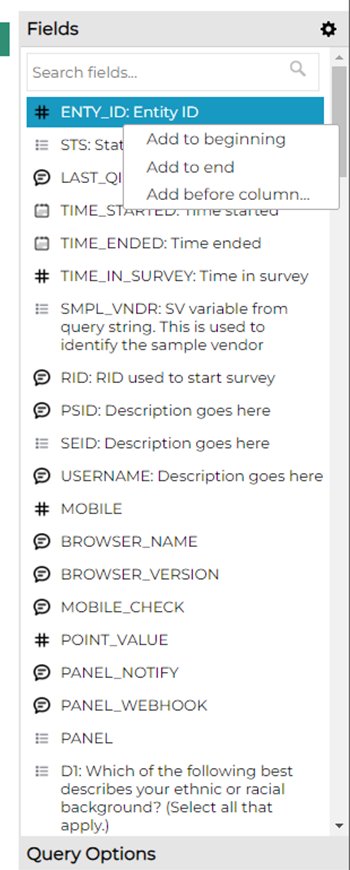

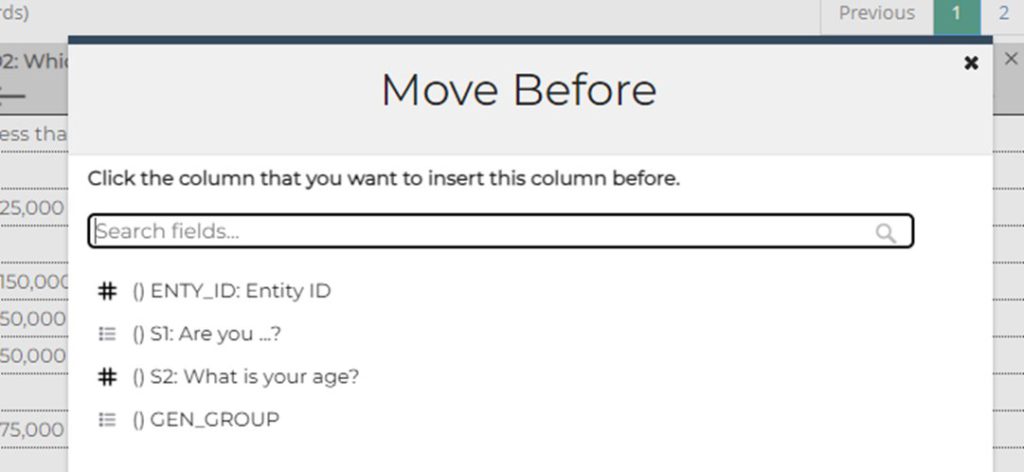
Right-click on a field in the Fields list to open a dialog box, which will offer options to:
- Add that field to the beginning of the query
- Add that field to the end of the query
- Place that field before a specific column
Filtering and Customization
Applying Filters
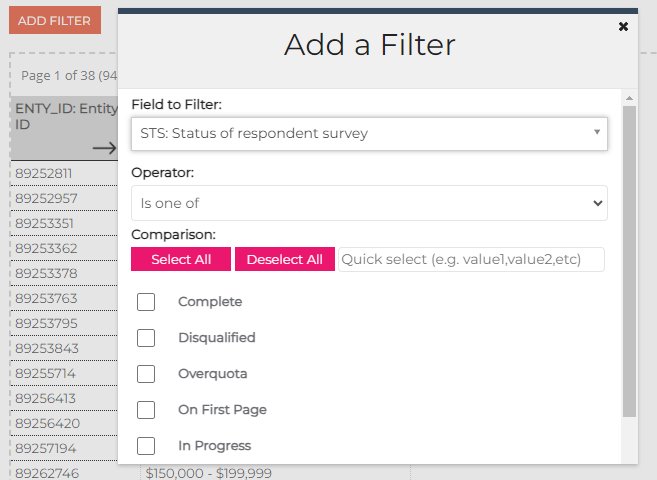
- Click on the “ADD FILTER” button to open the Add a Filter dialog box
- Set “Field to Filter” to the desired field
- Set “Operator” to the appropriate option (e.g., “Is one of”, “Is NOT one of”, etc.)
- Select your filter criteria from the list
- Click on “OK”
Multiple filters can be applied to the same query for more refined results.
Column Reordering

Option 1: Use the left and right arrows in the column headers to shift a field one space at a time.
Option 2: Right-click on the column header to open a “Move Column” dialog box, which offers options to:
- Move that column to the beginning of the query
- Move to the end of the query
- Place before a specific column
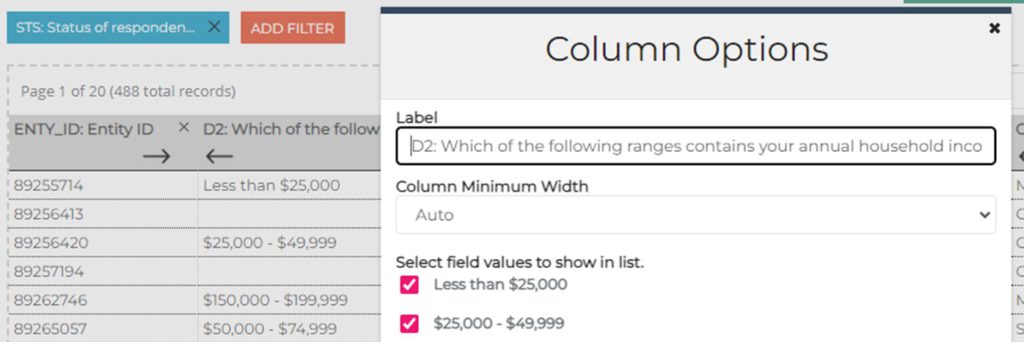
Renaming a Column
Option 1:
- Left-click on column header to open “Column Options”
- Enter new field name under “Label”
Option 2:
- Click the gear icon at the top right of the Fields list to open Configure Fields
- Select the question of interest
- Enter new field name under “Label”
Adjust Stub Labels
- Click the gear icon at the top right of the Fields list to open Configure Fields
- Select the question of interest
- Enter new stub label
Adjust Column Width
- Column Minimum Width is preset to Auto
- Click on the drop-down menu to change the field width
Multi-select Questions Display
Multi-select questions are preset to display as separate columns for each option once Design Mode is exited.
To display multi-select questions as a single column:
- Click “Query Options”
- Select “No” under “Separate Columns for Multiple Choice Options”
Filter by Response
This allows you to filter the query by specific responses:
- Access column options
- Under “Select field values to show in list,” check or uncheck boxes next to answer choices
Adjust Query Caption
- The default caption for a query is the dataset’s name
- To change the query caption, click “Query Options” and enter a new caption under “Caption”
Saving, Sharing, and Exporting
Save Your Query
Click “Save” to save your edits.
Exit Design Mode
Click “Exit Design Mode” to enter a view-only mode. Columns can still be sorted, but other edits are not allowed in this view.
Share with Others
Click “Share” to select which team members will have access to your query.
Export to Excel CSV
Click “Export” to export to an editable Excel CSV file.
Getting Support
If you encounter technical issues with the Query Tool or have feature requests, contact the support team.