
The AI-Moderated Interviews tool leverages AI technology to perform a large number of qualitative interviews quickly and at a significantly lower cost than human-led interviews.
Best for:
- Conducting shorter qualitative interviews at scale
- Conducting interviews faster than humans
- Providing a consistent interview experience that follows a script and avoids human biases
The following information describes how to set up and conduct research using AI-Moderated Interviews:
Viewing and Analyzing Interview Results
Changing Interview Statuses (coming soon)
Launching an Interview from a Bellomy Survey
Launching an Interview from Another Provider
Designing an Interview
Overview
The AI-Moderated Interviews Designer provides a powerful way to create and configure AI-driven qualitative research interviews. This tool allows you to set up all aspects of an interview that will be conducted by an AI Interviewer, including background context, parameters, interview structure, and closing information.
Highlights:
- Set detailed project background and objectives
- Configure interview parameters
- Create organized sections and questions
- Customize the AI Moderator’s tone and approach
- Provide specific closing instructions
- Test your interview design before publishing
Accessing the AI Interview Designer
The AI Interview Designer can be accessed through the AI Moderated IDIs section of the Research Cloud interface.
- Navigate to the AI-Moderated Interviews from the RC home page
- Create a new interview using the “+ Add AI Interview” button
- Select “Design…” from the dropdown menu to enter the Designer for the new or existing interview

Designer Interface Overview
The AI Interview Designer consists of multiple tabs that organize different aspects of your interview:
- Background: Define the project context and objectives
- Parameters: Set up URL variables and friendly names
- Interview: Create sections and questions for the interview
- Closing: Configure the end of the interview experience
At the top of each page, you’ll see navigation buttons to move between tabs, along with Save and Test buttons at the bottom right.
Background Configuration
The Background tab allows you to provide essential context that helps the AI Interviewer understand the purpose and goals of the research.
Project Background and Objectives
While all of the Background fields are optional, this information provides the AI Interviewer with context for the interview and are used to:
- Explain the reasons and rationale for why the research is being conducted
- Guide the AI Interviewer to ensure the interview objectives are achieved
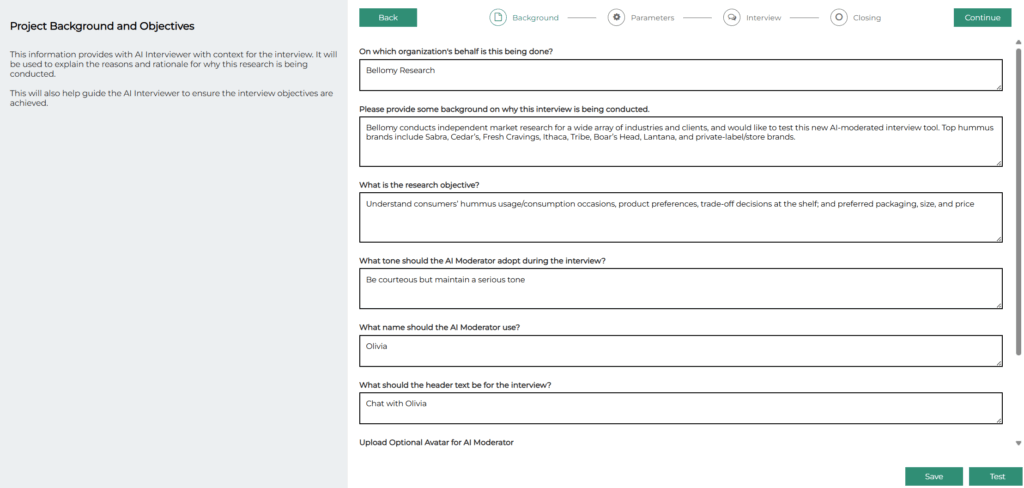
Key Fields to Complete
- Organization’s Behalf (optional): Enter the name of the organization for which the research is being conducted
- Background on Why Interview Being Conducted (optional): Provide context on why this interview is being conducted
- Research Objective (optional): Define what you aim to learn or discover through this research
- AI Moderator Tone (optional): Specify how the AI should communicate with respondents
- The AI will follow these tone guidelines throughout the interview
- Examples:
- Be courteous but serious
- Be playful and lighthearted
- Do not acknowledge responses, just ask the next question
- AI Moderator Name: Choose a name for the AI Interviewer (e.g., “Bell”)
- Header Text: Set the text that will appear at the top of the interview (e.g., “Chat with Bell”)
- Optional Avatar: Upload an image to represent the AI Moderator (optional)
Parameters Configuration
Parameters allow you to pass information to the interview that informs the AI Interviewer about the respondent (i.e. demographics). They can be piped into question verbiage, and they can be used in logic that decides whether or not to ask a question.
About Parameters
- Parameters are passed in the URL when the interview is launched
- They can contain demographic information, selections from screener surveys, or other custom data
- Parameters can be used to determine whether to ask specific questions
Setting Up Parameters
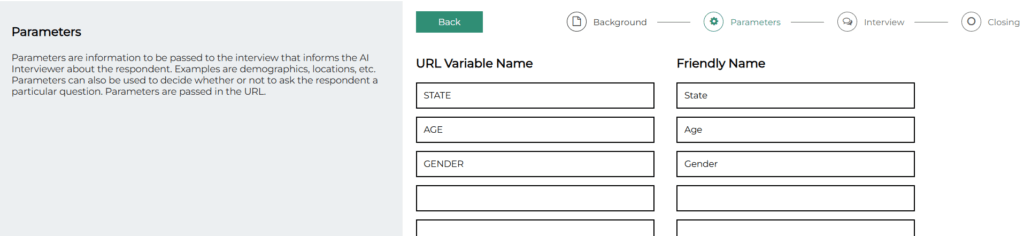
- URL Variable Name: The technical name used in the URL (e.g., “age_group”)
- Friendly Name: A human-readable label for the parameter (e.g., “Age Group”)
- Add as many parameter pairs as needed for your research
Interview Sections and Questions
The Interview tab is where you create the structure and content of your interview.
Creating Sections
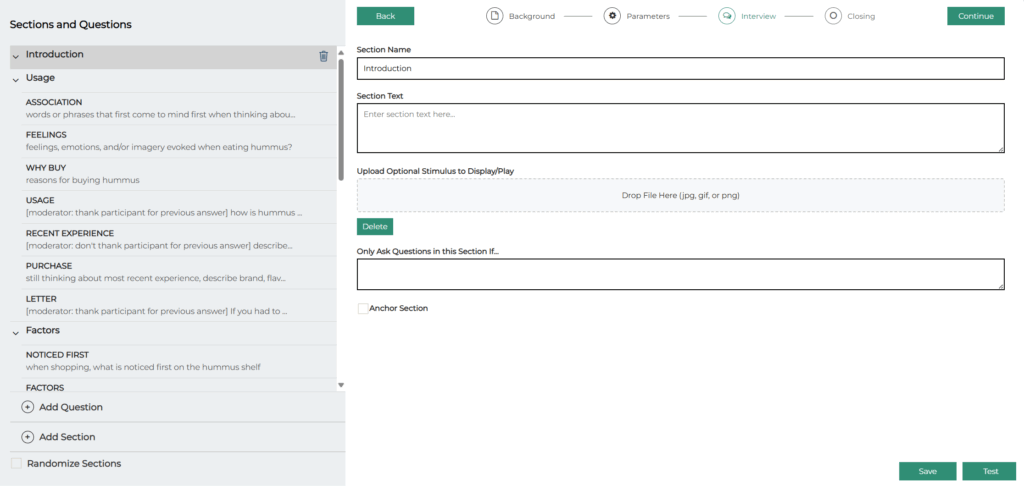
Sections help organize your interview into logical parts:
- Click “Add Section” to create a new section
- Provide a “Section Name” (e.g., “Introduction”)
- Add optional “Section Text” that the AI Moderator will use to introduce the section
- Upload an optional stimulus file if you want to display an image during this section
- Use “Only Ask Questions in this Section If…” to set conditional logic for the entire section. See “Creating Questions” below for more detail on conditional logic.
- Check “Anchor Section” if questions in this section should always be asked in the same order in the interview
- Check Randomize Sections if sections and their questions should be asked in random order
Creating Questions
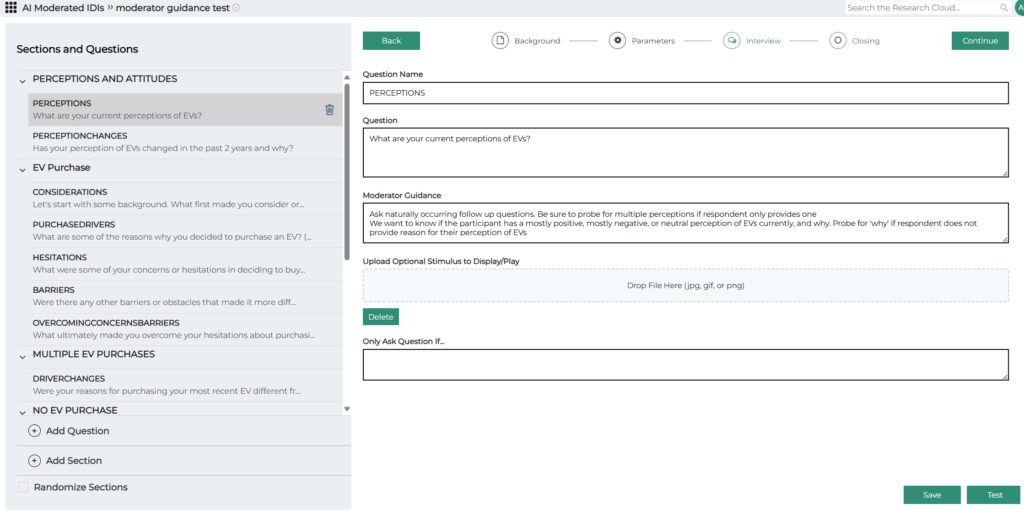
Within each section, you can add individual questions:
- Click “Add Question” to create a new question
- Provide a “Question Name” for reference (e.g., “Q1”, or “Favorite Hobby”). Please note that the Question Name will be used later in the reporting and analysis tools to identify the question.
- Enter the actual “Question” text that the AI Moderator will ask.
- The exact verbiage of the question does not need to be specified. A brief description of what is to be asked allows the AI moderator to phrase it appropriately.
- Additional information can be included when asking the question. For example: “How much do like living in [City]?”
- Provide Moderator Guidance to instruct the moderator how to handle asking the question or probing for additional information. Examples could include:
- “Ask naturally occurring follow up questions. Be sure to probe for multiple perceptions is respondent only provides one.” (this example was for a question asking the participant about their perceptions of something)
- “We want to know if the if the participant has mostly positive or mostly negative perceptions of the topic. Probe for ‘why’ if respondent does not provide reasons for their perceptions.”
- “After the respondent answers, probe with at least two follow up questions to understand more about why they have those perceptions. Ask the follow up questions one at a time – wait for the respondent to answer the first one before asking the next one.”
- “If the respondent’s answer to this question contains the word “hate”, do not ask any follow up questions – move directly to the next question.”
- For a question to gauge the interviewee’s feeling without using a rating scale: “do not ask this as a rating scale question”
- “Before asking this question, thank the participant for their answer to the previous question”
- “Don’t thank the participant for their answer to the previous question”
- Upload an optional image stimulus file to display with this specific question
- Use “Only Ask Question If…” to set conditional logic for this question. Examples include:
- “only ask if State is NC” (State could be a parameter to the interview, or a previous question in the interview)
- “they don’t like yardwork” (if there was a previous question that touched on this)
Section and Question Management
- Use the arrows in the left panel to expand/collapse sections
- Drag and drop sections or questions in the left pane to re-order them
- Click the trash icon to delete a section or question. Note that deleting a section deletes all of the questions in the section.
- Check “Randomize Sections” at the bottom of the page to present sections in random order
Closing Configuration

The Closing tab allows you to configure how the interview will end.
Closing Message
Enter any specific closing comments that the AI Interviewer should make at the conclusion of the interview. This might include:
- Thank you messages
- Information about next steps
- Additional context about how the data will be used
Redirect Location
If the respondent’s browser should be redirected to a particular website after completing the interview, specify the URL here. This is useful for:
- Returning respondents to a survey platform
- Directing respondents to a thank you page
- Sending respondents to receive compensation
See Launching an Interview from a Bellomy Survey for more information on survey integration.
Saving and Testing
Save Your Interview Design
Click “Save” to store your current design progress at any stage of interview design. Your changes are also automatically saved as you navigate between tabs.
Test Your Interview Design
Click “Test” to preview how your interview will appear and function. This allows you to:
- Experience the interview as a respondent would
- Verify that your questions and logic work as expected
- Make adjustments before publishing
Testing can be done at any stage of interview design – you don’t need to wait until all of the interview information has been entered to test it out! This means that you can add a few questions, test them out, tweak them, test them again, etc.
Publishing an Interview
Once your design is complete and tested:
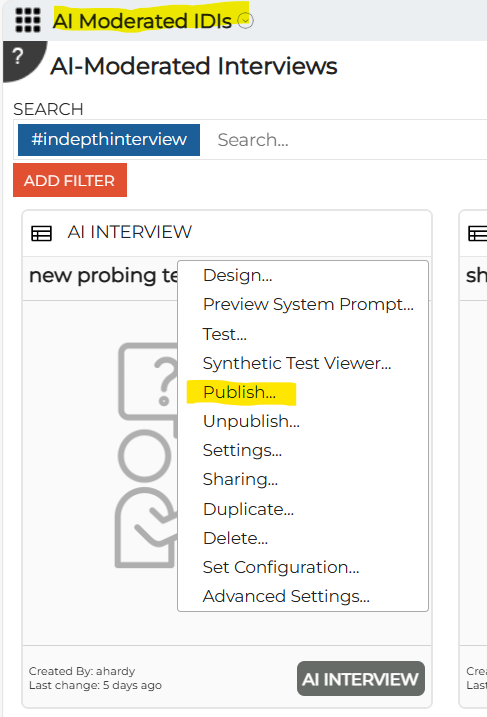
- Exit the Designer by clicking on the “AI Moderated IDIs” link that is part of the navigation breadcrumb.
- Select “Publish…” from the dropdown menu for your interview
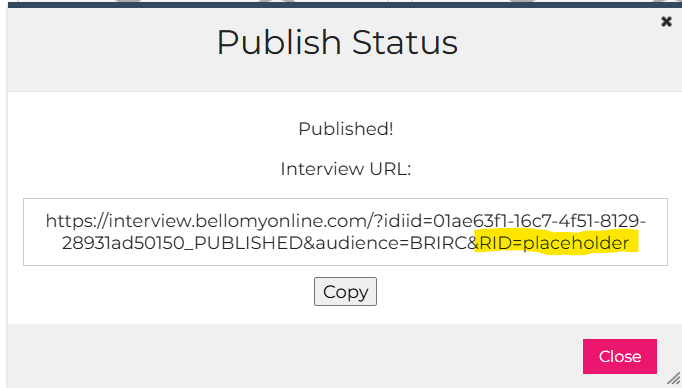
- The interview launch URL is displayed and can be copied for inclusion in invitation emails, survey links, etc. For example, a published interview link might look like this, including placeholders where parameter values will be substituted in when individual interview requests are created.
https://interview.bellomyonline.com/?idiid=639207cc-f934-4773-aac9-2d4d906d5c4b_PUBLISHED&audience=BRIRC&STATE=placeholder&AGE=placeholder&GENDER=placeholder&STATE=placeholder
The Interview Experience
The interview experience works on a variety of devices. It looks like a typical chat window:
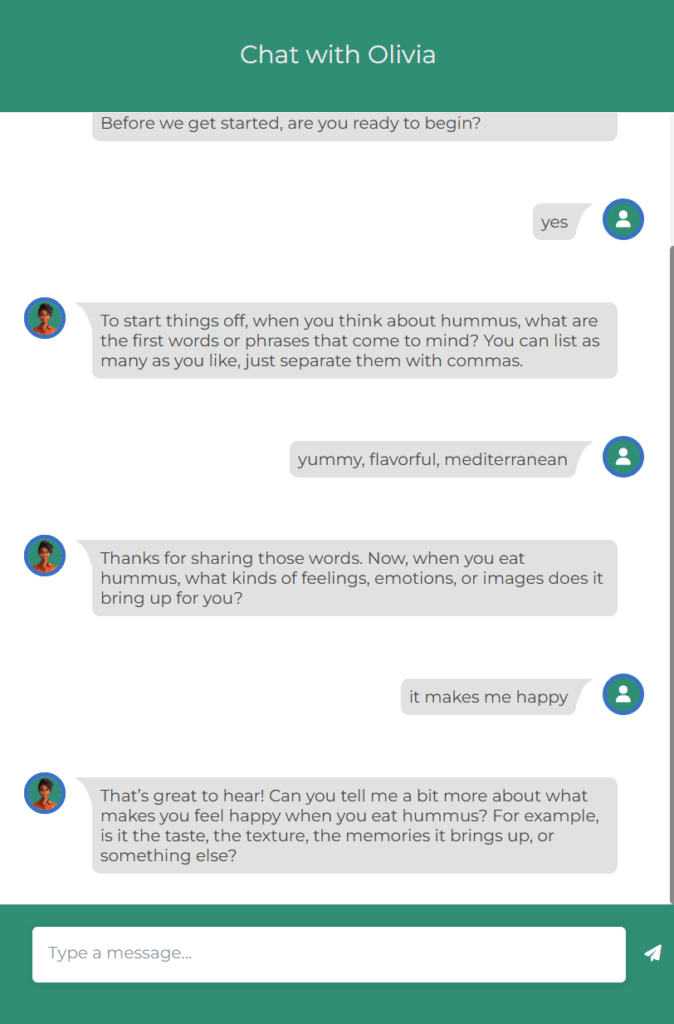
Please note that voice input is not supported on desktop devices. On mobile devices, voice input that is part of the device’s keyboard can be used.
Viewing and Analyzing Interview Results
When an interview is created, the following tools are automatically created to assist with viewing and analyzing interview results (they are accessed by clicking on the card for the interview):
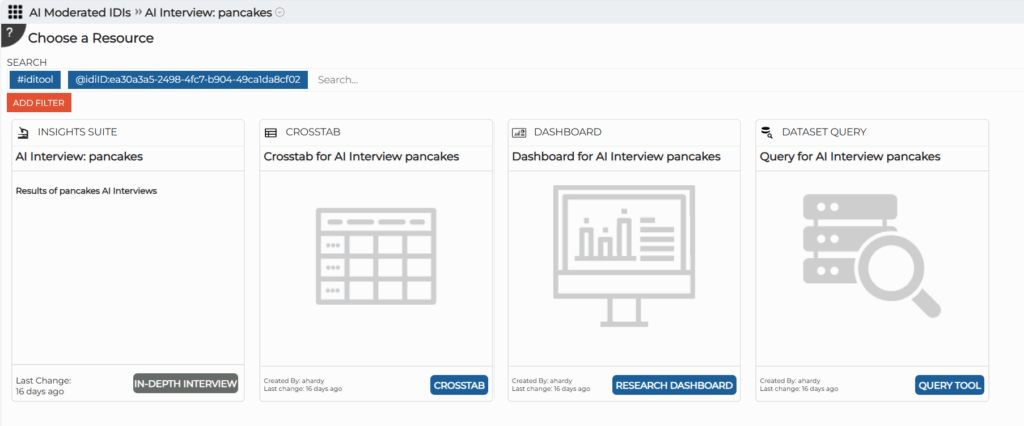
AI Analytics (Insights Suite)
The full power of the AI Analytics tool is available to analyze interview responses.
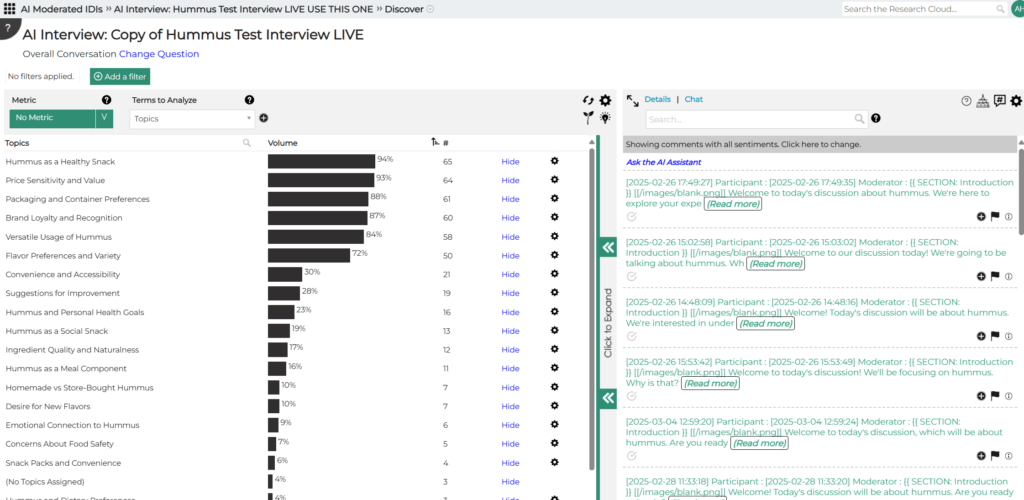
Please note for topic discovery, default prompts are already in place so that it understands that this is for an interview. This allows the topics to be geared to the participant’s responses rather than the moderator’s questions (which are also in the interview transcript).
Query tool
The Query Tool can be used to view raw interview data.
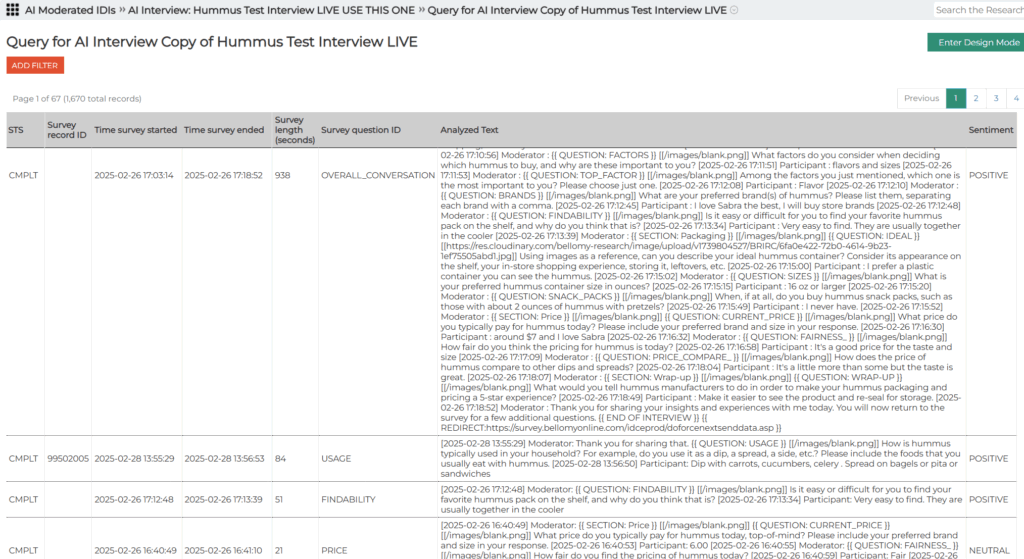
- Output rows are available for the entire interview transcript (by filtering on Survey Question ID = Overall Conversation) or on individual interview questions.
- If the interview was launched from a Bellomy survey, it can be related/connected back to the survey using the Survey Record ID field from the interview, and matching it to the ENTY_ID field in the survey.
- Note that Time Survey Ended is recorded on interview records using UTC. This is the different from legacy Bellomy surveys, which record using Eastern Time.
Crosstabs
Interview results can be analyzed using the Crosstabs tool. The following fields are keys to analysis:
- Standard AI Analytics fields such as Sentiment, Emotions, or Topics
- Parameter fields for the interview. If demographics were passed into the interview via Parameters, those demographic fields can be used in Crosstab analysis.
Dashboard
A standard dashboard is created that provides basic information about completed interviews, overall sentiment, and an AI-generated executive summary of findings.
Clearing Out Test Data
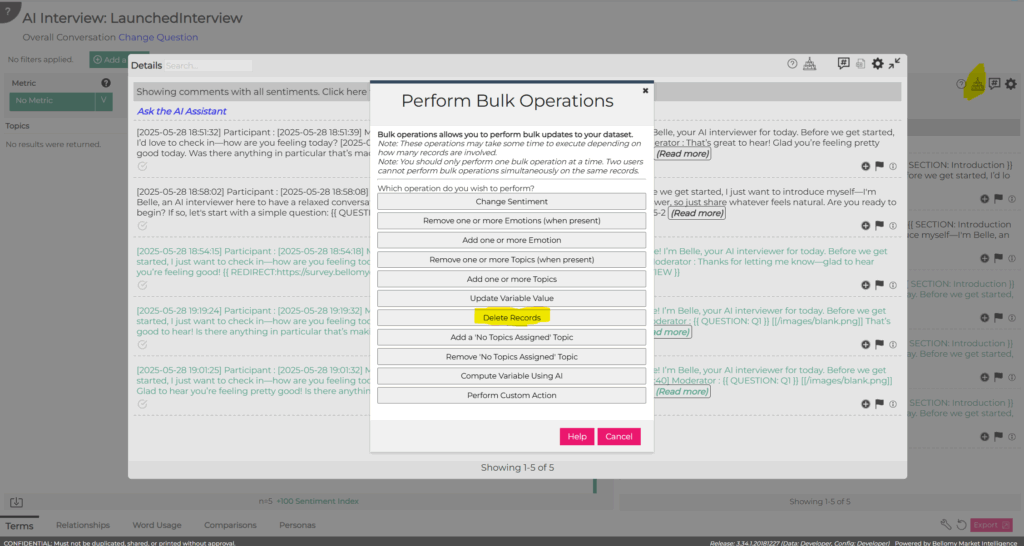
AI Interview data is stored in AI Analytics datasets. While this makes the data available for analysis, it also means that AI Analytics can be used to manage the data.
After an interview has been tested and is ready for launch, the AI Interview test responses can be cleared out (deleted) using the Bulk Operations – Delete Records feature in AI Analytics.
Launching an Interview from a Bellomy Survey
One possible way for launching AI-Moderated Interviews is for the participant to start in a traditional Bellomy survey, redirect to the AI-Moderated Interview, then return to the survey when the interview is complete.
In the survey, the following prelude script needs to be added to a redirect question:
option explicit
Survey.EnableNext true
When the AI-Moderated Interview is published from the AI-Moderated Interview Insight Option gear menu option, the interview launch link appears in a pop-up.
In the survey:
- That interview launch link is placed into the survey’s redirect question type. For example:
- https://interview.bellomyonline.com/?idiid=ada07f5b-2d36-48a4-b1ef-245ec3a9a238_PUBLISHED&audience=BRIRC&ENTY_ID=[ENTY_ID]&ANIMAL=[Q2]
- The production URL starts with “interview.bellomyonline.com” instead of the “cloudfront.net” domain that may show at the start of test interview links.
- The ENTY_ID is passed so that when the interview is complete it can return control to the survey.
- In cases where interview data is going to predominantly looked up by RID, the RID can be added as a parameter to the interview and passed in the interview launch link.
- To pass survey responses gathered to this point into the interview (e.g. to only ask interview questions based on specific survey responses), those survey responses are passed to the interview via query string parameters. In the example above, the respondent’s Animal selection made in Q2 is passed to the interview. Please note that for multiple choice questions, a separate parameter is required for each choice.
In the AI-Moderated Interview:
- any parameters to be passed in via the query string are added to the Parameters page in the Design tool. For example:

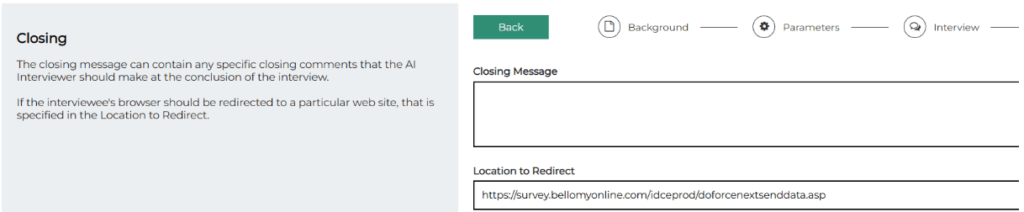
- The redirect https://survey.bellomyonline.com/idceprod/doforcenextsenddata.asp is added to the Closing information so that the interviewee returns to the survey when the interview is complete:
Note:
- in the course of taking an AI-Moderated Interview, the system may determine that the participant poses a security risk based on their responses (e.g. if the participant asks the AI Moderator for the API Keys). When that happens, the interview stops in its tracks – no message to the interviewee. In those cases, control will not be returned to the survey.
- when an AI Interview is launched as a Test, the &RESET_CONVERSATION=YES URL parameter is added to the interview launch link. This allows a tester to take the same interview multiple times.
- to test a production (published) interview link (that doesn’t contain &RESET_CONVERSATION=YES), take the interview in an Incognito or InPrivate browser session.
Launching an Interview from Another Provider
Another way to launch an interview is from another provider, such as a sample provider. The interviewee starts on the sample provider’s web site (or via a link provided from the sample provider), takes the interview, then control returns to the sample provider’s site.
In the example below, assume that the RID identifies the respondent. Two things are done to enable the scenario described above:
- A parameter is created in the interview to receive the RID passed by the sample vendor in the interview URL:

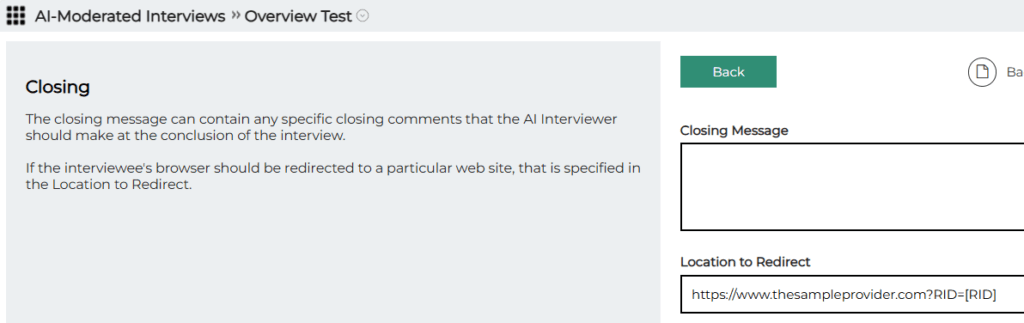
- when the interview closes, the sample vendor’s URL is included with the interview Closing information, including the RID so that they know who completed the interview:
- the sample vendor will substitute the unique RID for each respondent into the interview URL used to launch the interview:
Copyright 2025. All rights reserved.